How to Photograph a Lifestyle and Branding Portrait Session
Otavio Marques
3/18/20256 min read


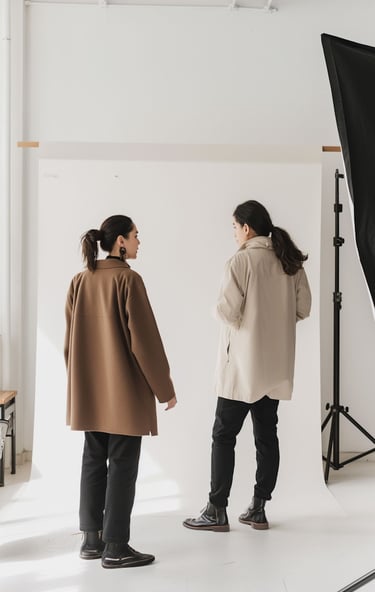
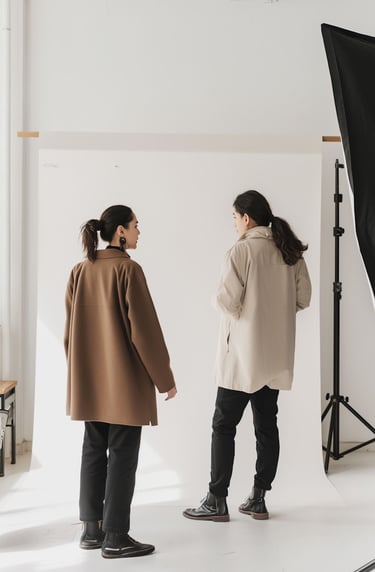
Capturing a lifestyle and branding portrait session goes beyond just taking a headshot—it's about telling a story. Whether you’re shooting for a personal brand, a creative entrepreneur, or a corporate professional, these sessions are designed to communicate personality, values, and professionalism through carefully curated imagery.
In this post, you'll learn how to plan, shoot, and deliver a lifestyle and branding portrait session that reflects your client’s unique identity. From lighting and location to styling and editing, these tips will help you create cohesive and captivating branding portraits that resonate with your client’s audience.
Why Lifestyle and Branding Photography Matters
In today’s digital world, strong personal branding is essential for building trust and engagement. High-quality lifestyle and branding portraits help clients present a polished and authentic image, whether they’re promoting their business, building an online presence, or connecting with customers.
Branding portraits give clients a face to their name, reinforcing credibility and professionalism. A successful session captures more than just a smile—it reflects the personality, energy, and story behind the brand.
Well-executed branding photography can:
Establish a recognizable personal or business identity
Create a professional and approachable online presence
Increase engagement and connection with the target audience
Provide versatile content for websites, social media, and marketing materials
Planning the Session
Successful lifestyle and branding portraits start with careful planning. Taking the time to understand your client’s brand, personality, and goals will set you up for a successful shoot.
1. Define the Brand Identity
Before the shoot, sit down with your client to clarify their brand identity and goals. Ask questions like:
What message do you want to communicate with these photos?
Who is your target audience?
What platforms will these photos be used on (e.g., website, social media, print)?
What emotions or themes should the photos convey (e.g., approachable, confident, creative)?
This information will guide you in making decisions about location, wardrobe, and style.
2. Choose the Right Location
The location sets the tone for the session. It should align with your client’s brand and reflect their personality.
Location Ideas:
Modern office or co-working space – Professional and polished
Outdoor park or urban setting – Relaxed and approachable
Home studio or creative space – Personal and authentic
Consider lighting conditions and potential distractions at each location. Natural light is often ideal for a soft and natural look, but bringing additional lighting can help you adapt to changing conditions.
3. Plan the Wardrobe and Styling
Wardrobe choices should reflect your client’s brand and personality while maintaining a professional and cohesive look. Encourage your client to stick to a cohesive color palette that reflects their brand’s colors and avoid busy patterns or overly bright colors that might distract from the subject.
Layering and adding texture can help create depth in the photos, making them more visually interesting. Suggest versatile outfits that work well for both casual and formal looks to provide flexibility. If the client is unsure about what to wear, recommending a professional stylist can help them feel comfortable and confident during the shoot.
4. Discuss Props and Brand Elements
Incorporating props that reflect the brand can make the session feel more authentic and visually interesting. Keep the props simple and relevant to the brand identity to ensure they enhance rather than distract from the subject.
For business or creative branding sessions, items like a laptop, notebook, or phone can reinforce a professional tone. Adding a coffee cup, books, or plants can introduce a personal touch and create a relaxed, lifestyle feel. Including tools of the trade, such as a camera for a photographer or a paintbrush for an artist, can showcase the client’s profession and add authenticity to the shoot.
The goal is to complement the subject without overwhelming the frame.
Shooting the Session
With solid planning in place, the next step is executing the session. Focus on creating a relaxed and engaging environment to help your client feel comfortable in front of the camera.
1. Establish a Connection
Start with casual conversation to help your client relax. Encourage natural expressions and avoid stiff or forced poses. Clients will look more authentic when they feel comfortable and connected to the photographer.
Tips for building rapport:
Play music that reflects the vibe of the session.
Keep the atmosphere light and conversational.
Give positive feedback to build confidence.
2. Direct Natural Poses
Lifestyle and branding photography should feel natural, not staged. Guide your client into relaxed poses that reflect their personality and brand.
Posing Tips:
Keep hands occupied with a prop or natural movement.
Encourage subtle body shifts to avoid stiff postures.
Direct the client to look away from the camera for a more candid feel.
Capture a mix of full-body, mid-length, and close-up shots for variety.
3. Use Natural and Soft Lighting
Soft, natural light is flattering and helps create a relaxed atmosphere. Position your client near large windows or shoot during golden hour for the best lighting conditions.
Lighting Tips:
Avoid harsh midday sunlight; opt for early morning or late afternoon.
Use reflectors to fill in shadows and balance exposure.
If shooting indoors, turn off artificial lights to prevent mixed color tones.
4. Capture Movement and Candid Moments
Lifestyle photography thrives on authenticity. Capture spontaneous moments and natural movements to make the session feel dynamic and real.
Ideas for capturing movement:
Have the client walk, laugh, or engage with a prop.
Encourage natural gestures like adjusting clothing or brushing hair.
Capture transitional moments between poses to add variety.
Editing the Final Images
Post-processing is where the magic happens. Editing enhances the mood and polish of the final images while maintaining a natural feel.
1. Adjust Colors and Lighting
Fine-tune the exposure, contrast, and color balance to create a consistent, polished look. Keep the tones natural and true to life.
Editing Tips:
Adjust white balance to match the lighting conditions.
Keep skin tones natural; avoid over-saturation.
Maintain consistency in color and style across the entire gallery.
2. Retouch Flaws (But Keep It Natural)
Clean up distractions without making the photo look overly processed.
Basic retouching includes:
Removing stray hairs and blemishes
Softening harsh shadows
Smoothing skin texture without losing detail
3. Create Multiple Crops and Formats
Provide a variety of image formats to give your client flexibility for different platforms and purposes.
Suggested crops:
Square format – Ideal for Instagram and social media
Horizontal – Great for website banners and cover photos
Vertical – Perfect for LinkedIn and profile pictures
Delivering the Final Gallery
Presentation matters. Deliver the final gallery in a professional format that makes it easy for your client to access and use the photos.
Suggested delivery methods:
Online gallery with download options
Watermarked proofs for client review
High-resolution and web-optimized versions
Offer a quick turnaround time to impress your client and increase the chances of getting referrals.
Best Software for Editing Lifestyle and Branding Portraits
For editing, use professional-grade software that gives you full creative control:
Adobe Lightroom – Best for consistent color correction and batch editing.
Adobe Photoshop – Ideal for detailed retouching and manipulation.
Capture One – Excellent for tethered shooting and color accuracy.
Luminar Neo – Great for quick AI-based adjustments and lighting fixes.
Affinity Photo – Budget-friendly alternative with powerful retouching tools.
Best Lens Based on Style and Situation
Populate the chart with the following data:
Situation: Classic headshots
Best Lens: 85mm f/1.4 or f/1.8
Why: Flattering facial proportions and creamy bokeh
Situation: Environmental portraits
Best Lens: 35mm f/1.8
Why: Wide angle for including more background context
Situation: General lifestyle shots
Best Lens: 50mm f/1.8
Why: Natural look and versatile for various shots
Situation: Variety in one session
Best Lens: 24-70mm f/2.8
Why: Flexibility to switch between wide and close shots without changing lenses
Situation: Dramatic background blur and compression
Best Lens: 70-200mm f/2.8
Why: Beautiful background separation and professional look
Recommended Strategy:
Start with a 50mm or 35mm for versatility and natural perspective.
Use an 85mm for close-ups and headshots with creamy bokeh.
Bring a 24-70mm if you need flexibility in framing during the session.
For dramatic compression or background blur, switch to the 70-200mm.
Why Lifestyle and Branding Photography Pays Off!
A successful lifestyle and branding portrait session helps clients connect with their audience on a personal level. Strong, authentic images reinforce trust and create a professional image that elevates your client’s brand.
By mastering the art of lifestyle and branding photography, you’ll increase your value as a photographer and create lasting connections with your clients.
Plan thoughtfully, direct naturally, and edit professionally. A well-executed branding session positions your client for success—and builds your reputation as a go-to photographer in the industry.