Shooting Real Estate Interiors - Lighting Tips and Tricks
Otavio Marques
3/31/202510 min read
You can transform your real estate photography by mastering the art of lighting. Proper lighting not only enhances the appeal of a space but also showcases its best features, making it more inviting to potential buyers.
In this post, you'll discover important tips to leverage natural and artificial light effectively, use light modifiers, and ensure your images capture the true essence of any interior. With the right techniques, you’ll be able to create stunning visuals that elevate your property listings.
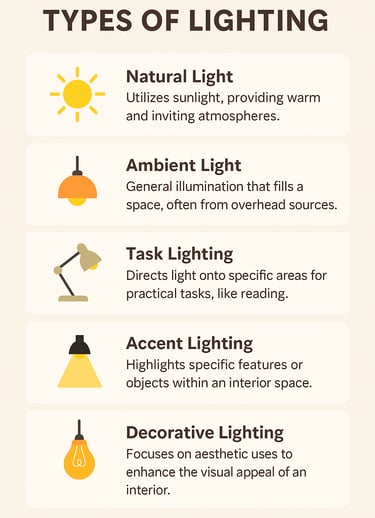
Understanding Lighting Essentials
The world of real estate photography relies heavily on the manipulation of lighting to accentuate the beauty of interiors. Successful photographers must recognize that not all lighting is created equal; understanding the different types of lighting available can drastically influence your images. With this knowledge, you can create a harmonious blend of light that enhances the appeal of a space. Below are the fundamental types of lighting you should consider:
Knowing the types of lighting will help you make informed decisions on how to best showcase interiors, creating images that resonate with potential buyers.
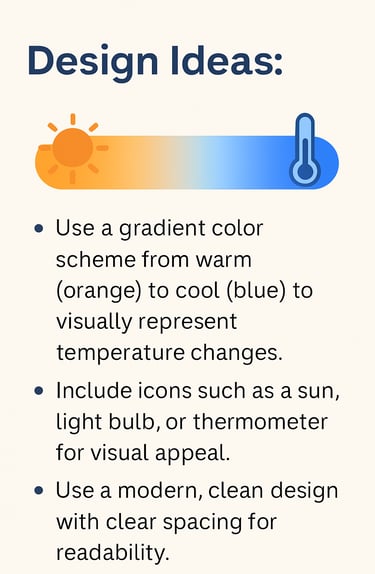
Color Temperature and Its Impact
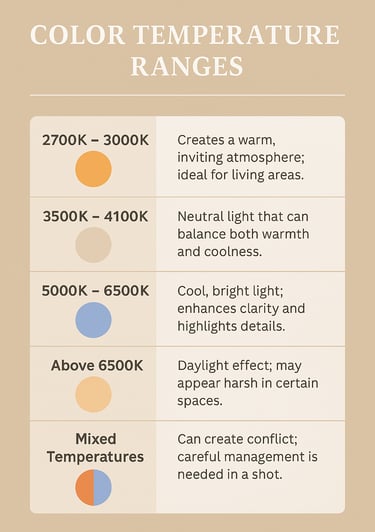
Understanding color temperature is necessary in determining the mood and feel of your photographs. This measurement, indicated in Kelvins (K), reveals the warmth or coolness of a light source. For instance, warm light typically ranges from 2700K to 3000K, creating a cozy ambiance, while cool light hovers around 5000K to 6500K, which can make a space feel more spacious and airy.
By utilizing the correct color temperature, you can set the desired tone in each photograph, aligning it with the space's intended vibe. Below is a closer look at how color temperature influences photographic outcomes:
Plus, if you aim to execute a successful real estate shoot, you should pay attention to how different lighting conditions affect your images' color. Harsh overhead lights can reveal unwanted shadows, while soft lighting can enhance textures and colors, making the space appear more inviting. Adjusting your lighting setup based on the color temperature will significantly impact the overall reception of your photos.
Natural Light Utilization
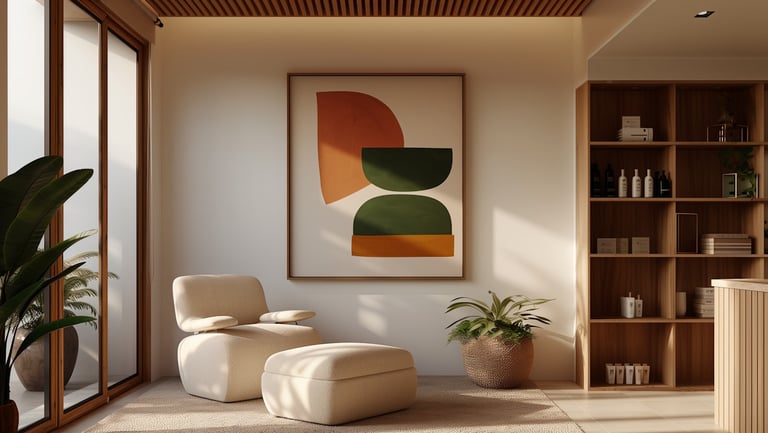
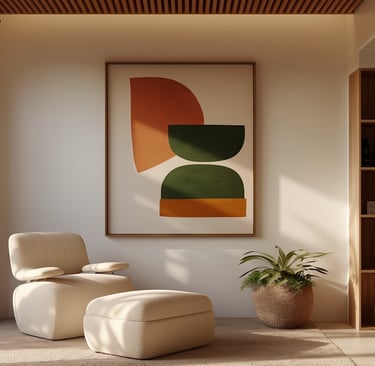
Some of the most impactful real estate photos leverage the beauty of natural light. To harness this light effectively, you must understand its qualities and how they interact with your interior spaces. Using large windows or open spaces can create inviting atmospheres, while strategically placing mirrors can enhance light distribution. For deeper insights into the subject, consider exploring Why and how to set up lighting for real estate photography?. You can adjust your camera settings to take full advantage of natural light, ensuring that the true colors and contrasts of your space shine through.
Timing and Weather Considerations
Among the most effective strategies for utilizing natural light is paying attention to timing and weather conditions. The soft glow of golden hour, just after sunrise or before sunset, casts a warm and inviting ambiance that can enhance your images dramatically. Different weather patterns also affect the natural light quality; for instance, cloudy days diffuse sunlight, providing an even, soft light perfect for interiors, while bright, sunny days may create harsh shadows. It’s necessary to plan your shoots accordingly to maximize light conditions.
Window Treatments and Reflective Surfaces
Surfaces in your space can significantly influence how light behaves. Using reflective surfaces can brighten up a room by bouncing light around. On the other hand, window treatments can either enhance or hinder your use of natural light. Sheer curtains allow for diffusion of light, creating a soft look, while darker or more substantial coverings may block light entirely. Consider the light entry points in your space and manipulate these features to either enhance or soften light as desired.
Hence, your choice of window treatments can directly impact the overall feel of your images. If you want to maximize natural light, opting for lighter materials can help keep the space airy and bright. On the contrary, heavier fabrics can create a cozy, intimate setting but may reduce lighting options. Utilizing combinations of these options will help you to balance ambiance and brightness, allowing you to capture stunning visuals that showcase the property to its full potential.
Artificial Lighting Techniques
One of the key components of successful real estate photography is understanding how to utilize artificial lighting effectively. Having the right fixtures can drastically enhance your interior shots, making spaces look more inviting and vibrant. You should consider the color temperature of light when selecting fixtures, ensuring they complement the natural light in the room. For instance, using bulbs with a warmer hue can create a cozy atmosphere, while cooler tones might be better for modern, minimalist spaces. Choose fixtures that can be adjusted or dimmed, allowing you to manipulate the light levels according to the specific needs of each shot.
Selecting the Right Fixtures
By evaluating the types of artificial light sources available, you can pick fixtures that cater specifically to your real estate photography needs. Incorporate a mix of overhead lighting, table lamps, and floor lamps to provide a balanced light source throughout the room. Aim for versatility; portable fixtures can help you adapt to various layouts and setups without much hassle. Also, consider using softboxes or diffusers to create a gentler glow, which helps in reducing harsh shadows and creating a more polished look.
Layering Light for Depth
Around your interior spaces, layering different light sources is vital to add dimension and visual interest to your photos. Start by establishing a key light, which should be your primary source, then add additional lights in strategic locations. For instance, placing accent lights to highlight architectural features or decor can bring out the character of the space while softening the overall atmosphere. This method not only enhances the aesthetic appeal but also allows you to create focal points that draw the viewer's eye.
Indeed, layering light can transform flat images into dynamic and engaging photographs. Consider using ambient, task, and accent lighting together to create a three-dimensional feel. Ambient lighting provides the overall illumination, task lighting focuses on areas where activities will occur, and accent lighting enhances specific features, allowing you to compile a rich tapestry of light that showcases the space fully. This approach not only brings depth to your composition but also helps to create an appealing narrative through your photos, vital for capturing the interest of potential buyers.
Equipment Recommendations
After you’ve established your vision for the interior shots, it’s time to focus on the gear that will help you achieve high-quality results. The right equipment can make a significant difference in how your space is portrayed. Invest in a full-frame camera for optimal image quality, paired with a wide-angle lens to capture more of the room in a single shot.
A lens with a focal length between 16mm and 24mm is typically ideal for real estate photography, as it enables you to showcase the layout without distortion. Additionally, consider using a sturdy tripod to ensure stability, especially in low light conditions, which will help avoid any blurriness and achieve a clean, professional look.
Camera Settings for Interior Shots
To maximize your camera's potential in interior settings, adjusting your camera settings is key. Start by setting your ISO at a low level, ideally between 100 and 400, to reduce noise in the image. Use a slow shutter speed, especially when using a tripod, to allow more light to enter the lens, creating well-exposed photographs. Aperture settings between f/8 and f/11 usually work best, providing adequate depth of field while maintaining sharpness across the entire image.
Light Modifiers and Accessories
For creating the perfect ambiance in your interior shots, light modifiers and accessories are crucial tools. Use softboxes or umbrellas to diffuse harsh lighting from your flashes, resulting in a soft, even glow that beautifully illuminates your subject. Reflectors can help bounce light into shadow areas, adding depth and dimension. Investing in a variety of gels is also beneficial; they can balance colors for a more natural look, ensuring that the light complements the existing ambient light in the space.
It is also advantageous to experiment with different light setups. Utilizing a combination of natural light and artificial sources can yield stunning results. Note, the goal is to create a warm and inviting atmosphere in your shots, which can certainly be achieved by carefully manipulating your light modifiers and accessories. Use your tools creatively to highlight the best features of the property, making sure to minimize any unwanted shadows and bring out the warm tones that make the space feel homely and inviting.
Common Mistakes to Avoid
Now that you've prepared your equipment and space for shooting real estate interiors, it's vital to steer clear of common pitfalls that can undermine your efforts. Photographic errors can significantly detract from the beauty and appeal of a property, which is why understanding these mistakes is imperative for achieving professional quality results.
1. Overexposure and Shadows
Beside aiming for a well-lit interior, one of the key pitfalls to avoid when capturing real estate photos is overexposure. This often occurs when the light in the room is too strong or when camera settings are not adjusted accordingly. Overexposure can wash out details in the highlights, making features like beautiful moldings or textures disappear. Furthermore, shadows can disrupt the overall balance of your composition; harsh shadows can create an uninviting atmosphere, while soft shadows can help define space and depth. To maintain control over the light, consider utilizing a combination of natural and artificial lighting sources, adjusting your aperture settings, and using reflective surfaces to help fill those shadows without introducing too much contrast.
2. Ignoring Room Function and Flow
Mistakes can also arise when you ignore the purpose of each room and how people interact within the space. It's important to consider the functionality and flow of a room when framing your shots. Each area has a distinct purpose, and the way you capture these spaces should reflect their functionality. A disorganized layout or clutter can also detract from the space, so be sure to stage it appropriately to highlight its intended use.
A key aspect of real estate photography is ensuring that potential buyers can envision themselves in the space. By considering the flow of the rooms and ensuring that each shot conveys a sense of functionality, you will evoke positive emotions and create a narrative for the property. When you thoughtfully capture how spaces transition and work together, it will enhance your storytelling and showcase the home in its best light.
Post-Processing Tips
Not every shot captures the perfect ambiance or the desired level of brightness. For real estate interiors, the magic often happens during the post-processing stage, where you can enhance your images to reflect the stunning qualities of the space. Here are some key tips to elevate your photography:
Use appropriate software to make adjustments
Be cautious with over-processing
Maintain the property’s true color palette
Utilize adjustment layers for better control
Consider HDR techniques for dynamic range
This will not only improve the visual appeal of your images but also convey the true essence of the property to potential buyers.
Enhancing Lighting in Editing
For optimal results in your real estate photography, enhancing the lighting during editing is a cornerstone technique. Adjusting the exposure, brightness, and contrast can help to bring out the best features of a room. You can create a balanced representation that showcases the interior design and promotes a welcoming atmosphere. If a room appears too dark or lacks vibrancy, consider using local adjustments to selectively brighten the areas that need it while preserving the integrity of the overall scene.
Adjusting Shadows and Highlights
With your images ready for refinement, adjusting the shadows and highlights is vital to ensure a well-proportioned and inviting look. Begin by lowering the shadows to allow the details in darker areas to emerge, providing depth and dimension to the overall image. Conversely, raising the highlights can enhance the appearance of natural light, effectively drawing focus to desirable features such as windows or light fixtures. Finesse the balance between shadows and lights to maintain a realistic but polished presentation.
Tips for adjusting shadows and highlights include utilizing curves and levels for finer control over tonal adjustments. Be wary of pushing shadows too far, as it can create an unnatural appearance or reveal unwanted noise in the image. Similarly, avoid overly bright highlights that might wash out key details. A subtle approach often yields the best results, allowing you to enhance the beauty of the interior without losing important elements.
To wrap up
Ultimately, mastering the art of shooting real estate interiors hinges significantly on your understanding and manipulation of lighting. By utilizing various techniques, such as the strategic placement of artificial lights, leveraging natural daylight, and employing reflectors, you can create vibrant imagery that highlights the unique features of a space. Your aim should be to reveal the personality of each room while providing potential buyers a clear vision of how it could feel to live in the space.
Additionally, experimenting with different lighting setups and angles will enhance your ability to depict a property's best side. As you practice these tips and tricks, you’ll find your shots not only improve but also become more reflective of your style as a photographer. Investing time in understanding light will pay off in the quality of your real estate images, ultimately helping to attract more interest and inquiries from potential clients. Your photography can set the standard in the competitive real estate market, so embrace these techniques with confidence.
FAQ
Q: What are some vital lighting techniques for shooting real estate interiors?
A: When shooting real estate interiors, it's important to maximize natural light and use artificial lighting to achieve a balanced exposure. Start by opening all curtains and blinds to let in as much natural light as possible. Avoid shooting in harsh sunlight; instead, aim for cloudy days or shoot during golden hour for softer shadows. Utilize external flash units or softboxes to fill in darker areas without creating harsh highlights. Adjust the white balance on your camera to match the light sources in the room for a more accurate representation of colors.
Q: How can I make a small room appear larger and well-lit in my photographs?
A: To create the illusion of a larger space, consider using a wide-angle lens that captures more of the room in one shot. Additionally, avoid clutter and keep the room organized to create openness. Use reflective surfaces, such as mirrors or glass elements, to bounce light around the space. Experiment with lighting placement—using accent lamps or strategically positioned floor lamps can highlight specific features. Finally, ensure that ceiling lights or recessed lighting are turned on to provide even illumination throughout the room.
Q: What should I do if the interiors are poorly lit with no natural light sources?
A: In scenarios with limited natural light, rely heavily on artificial lighting solutions. Begin by using multiple light sources to distribute light evenly across the room. A combination of softbox lights, portable LED panels, or off-camera flash can help to achieve this. Position the lights at different angles to reduce shadows and brighten any dark corners. Consider using a longer exposure setting on your camera to allow more light in, but use a tripod for stability to avoid blurriness. Additionally, using a higher ISO can help capture more light, but be cautious about noise in your images.